Alright, let’s get real—if you’re a knitter or someone who works with knitted fabrics, you’ve probably stared at a finished piece and thought, “This shape is cute, but it’s a little wonky.” Maybe a sweater’s sleeves are uneven, a scarf curls so bad it’s hard to use, or a shawl looks smaller than the pattern said it should be. As a knitted fabric supplier, I’ve seen this problem A LOT from both small craft studios and big clothing brands. The fix? Blocking. But it’s not just “spray water and hope for the best”—there’s a science to it, and I’m breaking it down like we’re chatty over a coffee (no stuffy terms, promise). Knitted Fabric
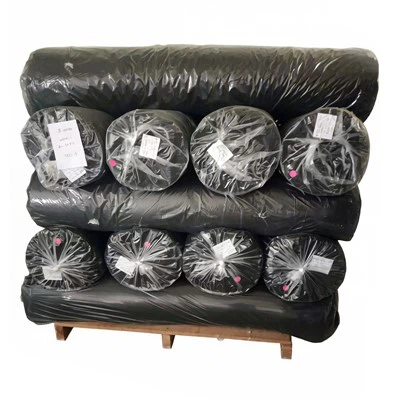
First, let’s talk about why blocking matters, because let’s skip the boring intro. Knitting uses yarn, right? Yarn has these little fibers that hold tension when you’re working—each stitch pulls tight, so your fabric ends up tense, stretchy in some spots, stiff in others. Blocking relaxes that tension, evens out all those messy stitches you might’ve missed mid-project, sets the drape (that fancy word for how fabric falls) so it looks exactly how it’s supposed to, and yeah, can even make a piece bigger if that’s what you need. For my crew here, when we send out knitted fabric rolls to clients, we always note how they were pre-blocked in our facility—but a lot of folks don’t realize you can do it at home too, depending on what you’re working with.
Now, let’s get to the “how” part, because that’s what you’re here for. But first: quick rule of thumb. The method depends entirely on your yarn type. Cotton, linen, and bamboo? They’re plant-based, so they love water—you can get them totally wet. Wool, cashmere, alpaca? They’re animal fibers, so too much water can felt them (turn them into a fuzzy, tight mess like old sweaters your grandma had). Acrylic, nylon, or polyester blends? They’re synthetic, so water is hit or miss—some can’t handle high heat, so you gotta be gentle. That’s the non-AI, real-stuff I learned after a client once accidentally turned a batch of our 100% merino swatches into felt they used for coasters. Oops.
Let’s dive into each method, starting with the most common ones I see.
-
Wet Blocking: This is the gold standard for plant fibers (cotton, linen, bamboo) and also works like a charm for wool if you do it right. Wait, wait—wool wet blocking: just don’t wring it, okay? Here’s the step-by-step no-fuss way:
First, fill a sink or basin with lukewarm water (hot water = bad for most yarns, it fades and weakens fibers). Add a tiny bit of gentle wool wash or even baby shampoo—no harsh detergents, they’ll strip the yarn’s natural softness. Submerge your fabric for 10-15 minutes, don’t swish it around too much, that can stretch stitches. Then, take it out—don’t twist or wring! Instead, press it gently between two clean towels to squeeze out excess water. If it’s super thick, you can roll it up like a burrito and step on it lightly (wearing clean socks, obvi) to get more moisture out.
Next, laying it out. You need a flat, non-porous surface—like a foam blocking mat (I swear by these, you can pick ’em up cheap at craft stores, or even use a clean carpet or a old sheet on a table). Pin it into shape with rust-proof T-pins or blocking pins—measure it! If your pattern says a scarf should be 7 inches wide and 70 inches long, pull it to those exact measurements, stretch evenly so it’s not lopsided. For shawls with curves, pin the edges smoothly, no bunching. Then, let it air dry completely—usually 24 hours, maybe more if it’s thick. Don’t use a hair dryer or radiator, that can make fibers shrink unevenly. -
Steam Blocking: This is my go-to for animal fibers (wool, cashmere, alpaca) and synthetic blends. Why? Because you don’t get the fabric totally wet, so less risk of felting or stretching. Here’s how to do it without burning your fabric:
Grab a clean iron, turn it to the right temperature—check your yarn’s label! Wool usually needs medium heat, acrylic needs low. Lay your fabric flat on a blocking mat, no pins yet (unless it’s a stretchy synthetic that won’t hold shape otherwise). Hold the iron 1-2 inches above the fabric, so the steam hits it but the iron doesn’t touch. Steam every section for 5-10 seconds, then gently pat the fabric with a clean towel to smooth out stitches. Once you’re done steaming, pin it into shape and let it cool completely for 1-2 hours. That sets the shape way better than just steaming and walking away. Pro tip: Don’t use a steam iron that spits water drops—those can leave wet spots that cause shrinkage. -
Spray Blocking: This is the lazy person’s version, or for super delicate fabric (like lace or fine cashmere that might pill if wet). Just spray your fabric lightly with lukewarm water—don’t soak it, just make it damp all over. Then pin it to shape, let it dry. It’s fast, but I find it doesn’t set stitches as well as wet or steam, so save it for small projects.
Wait, let’s talk about common mistakes I see all the time, because these are the things that mess people up. First: Wringing wet fabric. I can’t stress this enough—wringing pulls stitches out of shape, especially in lace or fine knits. Second: Using too much heat on synthetics. I had a client once use a hot iron on our polyester blend fabric, and it melted a hole right through it. Ouch. Third: Not measuring before pinning. You can’t just guess the size—use a tape measure, even if it’s a cheap one. Fourth: Drying in the sun. Sunlight fades some yarns (like cotton and linen) and can make wool brittle over time. Stick to indoor, low-humidity spots (but don’t leave it in a closed closet—needs air to dry properly).
Now, as a knitted fabric supplier, I gotta tie this back to work, right? Because a lot of my clients are small clothing brands, costume designers, and even home decor makers who use our knitted fabrics. Pre-blocking your fabric before you cut or sew is a game-changer. I used to get so many emails from brands saying, “We cut our fabric, sewed it, and now it’s shrunk 2 inches!” Pre-blocking lets the fabric settle, so when you cut it, the pieces stay the size you want. For example, if you’re making a linen sweater, pre-block the fabric first, cut your pattern pieces, then sew—way fewer headaches with uneven hems or sleeves.
Wait, another thing: If you’re working with a knitted fabric that’s already rolled up from my warehouse? Unroll it, lay it flat, and give it a light spray with water before blocking (if it’s plant-based) or a light steam (if it’s animal). That takes out the creases from being rolled tight, so your blocking works better.
Let’s do a quick case study, just to make it real. Last quarter, a local brand came to me with a batch of our 100% cotton jersey fabric. They’d cut it, sewn a bunch of tees, and when they washed them, they shrunk 1 inch in length and 0.5 inches in width. I told them to take a yard of the uncut fabric, wet block it, cut their tee pattern, and then test sew. They did, and the final tees didn’t shrink at all when washed. Why? Because when you uncut fabric is tense, it shrinks when washed, but pre-blocking relieves that tension. That’s the kind of stuff we teach all our clients, not just “here’s your fabric, good luck.”
Now, what about blocking finished garments vs. uncut fabric? Finished garments are for when you’re done knitting or sewing—fixing that lopsided sweater, making a scarf curl less. Uncut fabric is for prep work, so your final product is consistent. Both use the same methods, but uncut is easier because you can lay it flat without worrying about necklines or seams.
Wait, let’s talk about pilling—another common complaint. If you’re working with a fabric that pills (like some blends), don’t wet block it too harshly. Spray blocking is better, because wetting and rubbing can make pills worse. I always mention that in our product descriptions, too, so clients know what to expect.
What about if your fabric is stretchy, like a rib knit? Blocking still works, but you don’t want to pull it too tight. Rib knits have that 2-way stretch, so when blocking, pull it to the desired size but not beyond its natural stretch. I once saw a brand pull a rib knit top so tight when blocking that it came out smaller than the pattern—lesson learned, go slow with stretchy fabrics.
Okay, let’s wrap this up, but here’s the thing: blocking isn’t a chore—it’s the secret to making your knitted fabric look professional, no matter if you’re a hobbyist or a big brand. If you’re new to it, start small—try blocking a scarf first, so you don’t mess up a big project. And if you’re sourcing knitted fabrics, we’ve got pre-blocked options in our warehouse, or we can give you tips on how to block your own stock once it arrives.
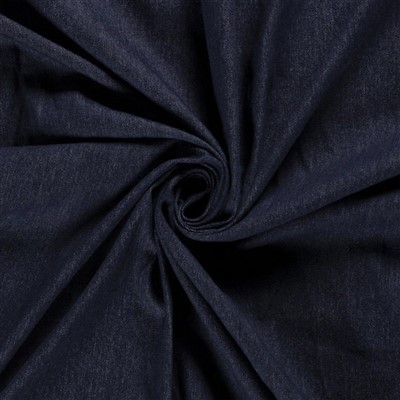
If you’re looking for high-quality knitted fabrics for your next project—whether it’s clothing, decor, or something else—hit us up to chat. We can walk you through the best blocking methods for your specific fabric, answer any questions you have, and get you the materials you need. No stuffy sales pitches, just real talk about fabrics and blocking.
Sweatshirt Fleece References:
- The Knitter’s Book of Finishing: A Complete Guide to Blocking, Sewing, and Finishing Knitwear, Sixth & Potter, 2021.
- Textile Technology for Knitted Fabrics: Properties and Performance, Woodhead Publishing, 2019.
- Yarn Buying Guide: Fiber Types and Blocking Methods, Craft Yarn Council, 2022.
Shaoxing Xinlian Dyeing & Weaving Industrial Teade Co., Ltd.
We’re well-known as one of the leading knitted fabric manufacturers and suppliers in China. With a professional production team, we are able to meet the needs of the majority of our customers. Please rest assured to wholesale bulk customized knitted fabric from our factory.
Address: Building 3-2, Huangxian Village, Lanting Subdistrict, Keqiao District, Shaoxing City, Zhejiang Province, China
E-mail: inquiryxinlian@163.com
WebSite: https://www.xinliantextile.com/
